How to arrange your Valentine Roses
With the most romantic day of the year just a few weeks away, we know all of you budding flower crafters will be secretly hoping for some beautiful fresh flowers from your Valentine so you can enjoy arranging them! The traditional blooms to give on February 14th is of course the beautiful rose – with their velvety rich colour, long stems and high petal count, roses are a luxurious and romantic choice. And with The Floristry Supplier here to help with all your essential floristry supplies, you can have fun enjoying creating your own stunning arrangement!
So what tools do you need to arrange your Valentine roses at home?
Tools and material
- Clean vase or container
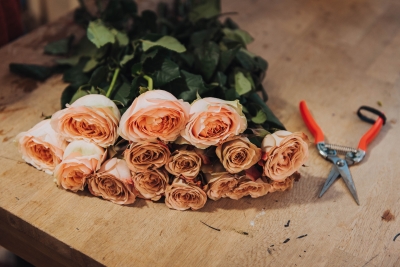
- secateurs or sharp scissors
- flower food
- water
- floristry tape
- flowers
- foliage such as gyp, eucalyptus or bay
- thorn strippers (optional)
Check out our selection of essential floristry supplies and best selling sundries that are available to order online. We offer direct floristry supplies delivered to your door, with free nationwide standard delivery when you spend £100 or more!
How to arrange your roses
Step 1 – Choose your vase or container – this could be a tall cylinder or round bowl. Important that it isn’t too large for the amount of stems you have, otherwise the flowers don’t have the support to build a beautiful structured arrangement. Ensure the vase is clean, then fill half way with tap water.
Step 2 – cut strips of the floristry tape, and position across the top of the vase to create a grid. This will help position the roses and hold them in the right place.
Step 3 – Trim the bottom of the stems at a 45 degree angle using secateurs or sharp scissors. How much to take off depends on the heigh of the vase using, so hold the rose up to the vase before snipping - recommended to cut the stem so that the rose head will sit just above the rim of the vase.
Floristry tip: roses will often still have guard petals on, to help protect them in transit. These browner looking petals can be gently pinched off when you are ready to arrange the roses.
Step 4 – Remove any leaves from the stem that will fall below the waterline, some people also remove the thorns using thorn strippers however in our experience the roses last longer with the thorns on.
Step 5 – get arranging! Start by placing the roses in the vase stem by stem, using the grid to evenly position them. Our advice is to put them in at a diagonal angle, so the stems will criss cross at the bottom.
Step 6 - When you are happy the roses are evenly displayed in the vase you can then add the foliage for volume and texture. We like adding the green foliage round the edges to create a loose country garden effect and adding a dash of white gypsophila around the centre of the arrangement.
Step 7 – Once you are happy with the look of your romantic rose arrangement, you can find the perfect spot to display.
Floristry tip: avoid placing the roses in strong direct sunlight or in a drafty spot, they prefer a stable temperature to last longer.