How to make a Flower Hat Box Arrangement
Hat boxes have been a hot trend the past few years, loved by everyone – from celebrities to florists. Stylish, contemporary and easy to transport, floral Hat Box arrangements make fabulous gifts for new parents, big romantic gestures, birthday celebrations, Christmas centre pieces, wedding favours … the list is endless.
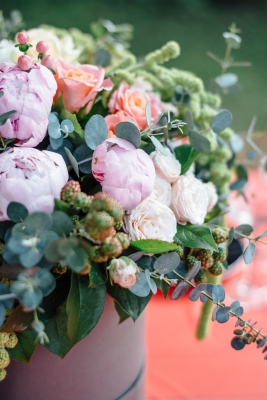
One of our best selling products here at The Floristry Supplier is our Hat Boxes, which just fly off the shelves! Our online Hat Box range includes lined and unlined boxes, in a variety of colours and shapes such as heart shaped hat boxes, rose gold hat boxes and velvet hat boxes. And brand new for Summer Season 2021, we simply adore these Round Couture Lined Hat Boxes in soft pale pink.
Making your own DIY Hat Box arrangement with fresh flowers at home is great fun, and a perfect starting point for floral enthusiasts as you don’t need many specialist tools. Fresh blooms that are brilliant for Hat Box designs (depending on seasonal availability) include hydrangeas, roses, spray carnations, sweet peas and ranunculus.
Tools and materials you will need:
- Lined Hat Box of your choice
- Oasis foam - check out our range of wet Oasis foam online
- Scissors / secateurs
- Fresh flowers and foliage
- Decorating ribbon
How to make a Hat Box arrangement
Step 1: Cut the Oasis foam to size, so that it will fit snuggly in the base of the hat box. Then soak the Oasis foam in a bowl or sink full of fresh water for a couple of minutes, so that the foam can absorb lots of moisture. Place the Oasis foam in the bottom of the hatbox.
Please note: Some hat boxes come unlined, so you will need to line the hat box with plastic liner before inserting the wet foam. To avoid this, check out The Floristry Supplier wide range of lined hat boxes available to order online which makes life so much easier!
Step 2: Using sharp floristry scissors or secateurs, snip the stems of your fresh flowers to desired height. For Hat Box arrangements, it is recommend to cut the stems so that the head of the flower will sit just above the top of the hat box.
Step 3: One by one, gently push the stems into the Oasis foam to create your desired design. Start with your base flowers and foliage, arranging them around the edges to hide the top of the hat box, then work inwards. Next add in your focus flowers, ensuring they are evenly spread throughout the design, so it will look beautiful from all angles.
Step 4: For the perfect finishing touch, wrap luxurious ribbon around the top or middle of the hat box and tie in a pretty bow.
Step 5: Proudly display!